More Photos Below!Gallery
A few years ago I bought a $8 Old Hickory 6″ butcher knife and it sat around. I’d bought it because I’d read that it was easy and fun to convert these into camp knives. Finally I went and just TOOK some time out of an overloaded (16 things on the to-do list!) day and just layed into it. Since then I’ve taken a few minutes here and there to move it along. …It’s the starting-up that’s the thing on so many little projects like this.
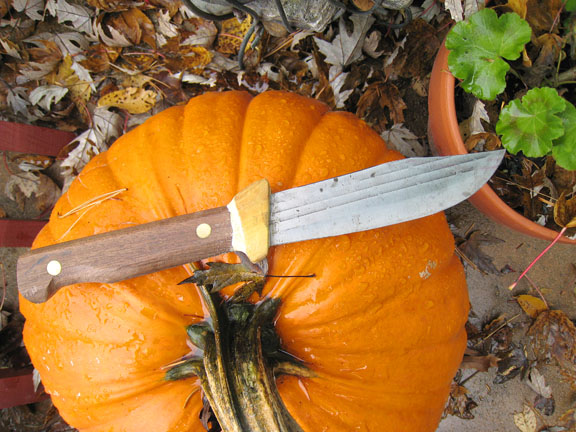
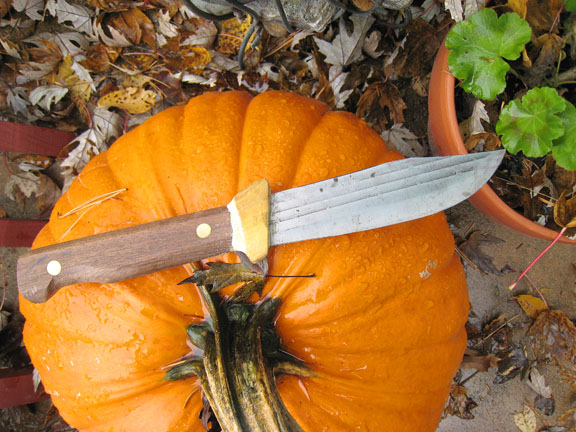
I’m not finished with it, but here’s a pic of how far it’s come along.
I’ve read that their skinner knives and the 8″+ butchers have thicker blades, if that’s what you want—seems perhaps smarter for a camp knife. But a thinner blade always slices a lot better and I haven’t bent a knife yet!
I kinda like the idea of a filet knife for deer—that’s what a classic 6″ boning knife is, with its semi-flexy blade and often upswept blade angle. But this here camp knife has a much wider blade. And it’s not like I’m very good at butchering deer, but I am getting quite a bit better at it. So, who knows how it will function in the real world.
I’ve been REALLY enjoying my Ahti Metsa 3.75″ puukko for whittling, but it has a VERY thick blade—so maybe this new knife will find a range of other uses. I didn’t have a sheath knife with a blade over 4″ so this is also part of testing out a bigger knife.
(Speaking of bigger knives, I’m testing out a bigger folder for my trail-clearing mission. My 3.75″ Spydy Endura works fine for my quick’n’on-the-go branch’n’bramble lopping but it’s perhaps a bit small. I’m looking into a 5-6″ pocket folder now! Report to come one of these days.)
I enjoy how the steel of the Old Hickory “sings” when you whittle with it—it makes a high-pitched “ping,” almost like a chime, when it’s used.
First, I used my bench grinder to take down the top of the spine about 1/2″ near the tip, tapering to an 1/8″ halfway back, in a kind of traditional clip-point shape—shortening the blade a 1/4″ as well, to bring the point closer to the centerline. (Maybe this semi-classic shape goes into a sheath easier?) Then I cut away some width from the edge side near the handle, to keep the sharp stuff just a bit further from my finger.
I thought that the OH could use a fingerguard. It dropped from the handle right to sharp blade so I was either going to put a guard on it or dull the blade for a ways. I decided to go with a guard. I really like Osage Orange wood so I whittled and sanded a couple pieces of Osage to make a guard, then I glued them on with the new high-tech West G-Flex epoxy—it’s their hot new uniquely flexible epoxy—I figure it might take repeated shoves and strains well. I shaped the guard to protect my finger and to give my thumb a point of purchase. It feels good so far.
When I’ve gotten the Osage guards wet they really glow and look a deep, beautiful yellow-gold. I look forward to putting some sealer on them to make them stand out permanently.
There were some gaps so I thought I’d fair them in and smooth out some transitions with putty. I had some old “Water Putty” that claims to be a great instant water-based “plastic.” I hope it’s tough enough after I stain and seal it.
I really like the “hook” for the little finger on my Ahti Metsa, so I cut one into the butt of the OH handle. We’ll see how that works for helping me hold onto the knife in use.
Next: finish the knife, make it pretty…and make a sheath!
Ya know, the sheath is almost the main thing about a camp knife. I’ve never made a sheath before! I’m thinking that a pocket clip would be a neat way to mount it but we’ll see. I have a couple other kitchen-cum-camp knives that need sheaths also.

Here’s how my knife started out. The 6″ OH is discontinued. There’s a 7″ now, but I think the 8″ would make a better camp knife, as it has a thicker blade.

Here she is, unfinished, but possessing a bit of panache even so.


